
How to Colorize Manga with AI, Step by Step
Learn how to colorize manga with AI step by step. Prep clean scans, pick a color style, keep characters consistent, and fix common mistakes in your pages.
To colorize manga with AI, start with a clean, high-resolution black-and-white page, upload it to an AI manga colorizer, choose a color style (anime, watercolor, natural or vivid), and decide how closely the model should follow your linework. Then review the result panel by panel and re-run or edit anything that drifted, like hair color or a costume. The coloring itself is quick; the prep and the review are what separate good results from muddy ones.
Below: the full workflow, the settings that matter, and the mistakes that make AI-colored pages look cheap.
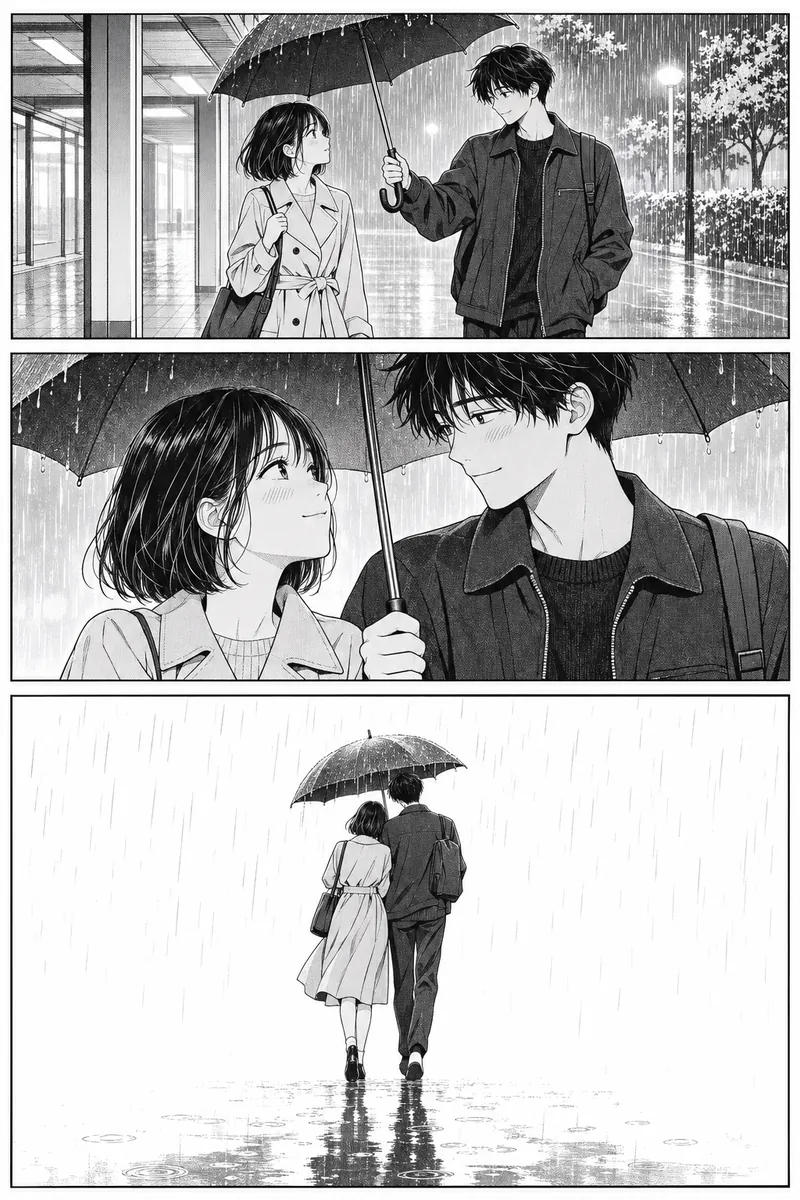
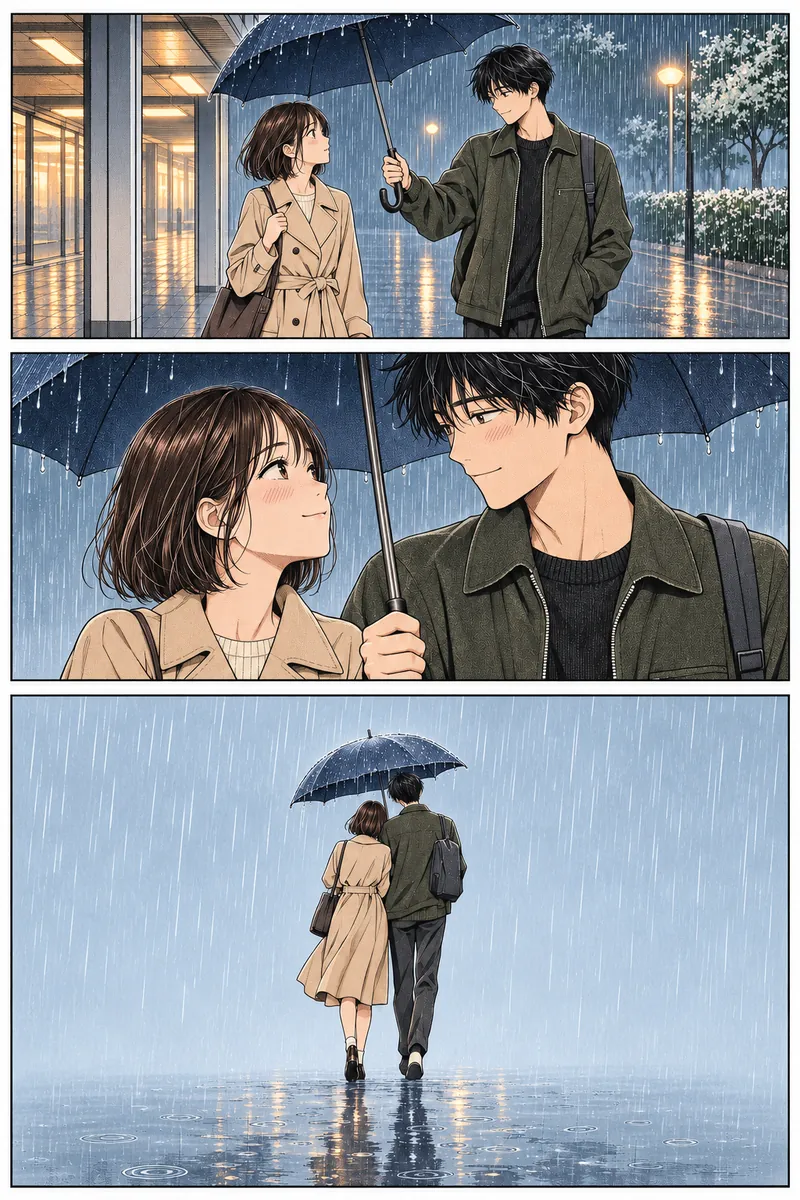
First, a word on rights
Only colorize pages you have the right to work with: your own art, pages you've licensed, or material that is in the public domain. Coloring someone else's published manga and reposting it is still redistributing their work, even if the colors are new. If you're practicing on a series you love, keep the results to yourself.
What an AI manga colorizer actually does
A modern image model doesn't "fill in" regions the way a paint bucket does. It reads the whole page — lines, screentone, composition — and generates a colored version that tries to respect the original drawing. That has two consequences:
- It's good at mood and lighting. It can infer that a rainy street scene wants cool blues and wet reflections, or that a festival panel wants warm lantern light.
- It can drift. It may reinterpret a small detail, change a character's eye color between pages, or soften fine hatching. Your job is to steer it and catch those drifts.
Treat the AI as a fast colorist who needs clear direction, not a scanner that returns a perfect copy.
Step-by-step: colorize a black-and-white manga page
1. Prepare a clean source page
Garbage in, garbage out applies more to coloring than almost anything else.
- Use the highest resolution you have. Low-res scans turn screentone into noise, and the model colors the noise.
- Straighten and crop. Remove scanner borders, page curl shadows and bleed-through from the reverse side.
- Level the blacks and whites. A quick levels adjustment so paper is white and ink is black gives the model crisp edges to follow.
- Leave screentone in place unless it's badly moiréd. The model uses tone as a hint for shading and value.
For your own digital art, export a flattened grayscale or line-only version at full size.
2. Pick a color style that suits the story
Different styles carry different tones. In YukiAI's Colorize tool you can choose between four:
| Style | Looks like | Works well for |
|---|---|---|
| Anime | Clean cel shading, saturated flats | Action, shonen, comedy |
| Watercolor | Soft edges, paper texture, gentle bleed | Slice of life, romance, flashbacks |
| Natural | Muted, realistic palette | Drama, horror, historical stories |
| Vivid | High saturation and contrast | Covers, splash pages, fantasy |
Pick one style per chapter and stick with it. Switching styles mid-chapter is the fastest way to make a series feel inconsistent. For a deeper look at how color styles relate to traditional tone work, see our guide to screentone and manga coloring styles.
3. Choose faithful or creative
Most colorizers offer some version of this trade-off:
- Faithful keeps your lines, composition and details as close to the original as possible. Use it for finished pages you want to publish in color.
- Creative gives the model room to add lighting effects, backgrounds and texture. Use it for covers, promotional art, or when you want to explore color ideas before committing.
When in doubt, start faithful. It's easier to add drama later than to recover linework the model reinterpreted.
4. Run the page and review it panel by panel
Don't judge the page at thumbnail size. Zoom in and check:
- Character colors: hair, eyes, skin, signature outfits. Are they what you intended?
- Speech bubbles: they should stay white or near-white, with readable text.
- Lighting logic: if a panel is at night, does it look like night? Is the light source consistent across panels?
- Lost detail: fine hatching, small background props, sound effects.
5. Fix problems with targeted edits, not full re-runs
If one thing is wrong — a jacket came out red instead of navy — re-running the whole page can fix that and break something else. Instead, use an instruction edit like "make the jacket navy blue" on the colored result. YukiAI's Edit with words feature works this way; we cover the technique in how to edit manga pages with words.
6. Export the chapter
Once every page is approved, export the batch. CBZ is the standard format for comic readers, and ZIP works for sharing with editors or uploading elsewhere.
Keeping colors consistent across a whole chapter
Consistency is the hardest part of AI coloring, because each page is generated separately. A few habits help a lot:
- Write a color sheet before you start. One line per character: "Aki — short black hair with blue sheen, amber eyes, red scarf, grey school uniform." Keep it open while reviewing.
- Color in story order. It's easier to spot drift when you compare page 7 to page 6 than to page 1.
- Use the same style and mode for every page in a chapter.
- Fix the first drift immediately. If a character's hair goes brown on page 3, correct it before moving on so you have a clean reference.
Common mistakes to avoid
- Coloring low-resolution web scans. You'll get blotchy skin and smeared tone. Find a better source.
- Expecting perfect results on the first pass. Plan on reviewing and touching up a few panels per chapter.
- Over-saturating everything. Vivid looks great on a cover and exhausting across 20 pages. Save it for moments that need it.
- Ignoring text. Check that dialogue stays legible, especially on dark backgrounds.
How YukiAI handles coloring
YukiAI is a browser-based manga studio built to be private by design. You don't create an account: a random credit key lives in your browser, and the server only keeps a one-way hash of it plus your balance. Your projects and pages are stored in your browser, not on YukiAI's server, and hosted job inputs and results are held in memory and purged within about 15 minutes. The models run through Venice AI's API. If privacy is a big part of why you're choosing a tool, our AI art privacy checklist explains what to look for in any service.
Practical details:
- Bulk import: drop in single images, whole folders, ZIP archives or CBZ files.
- Cost: about 4 credits per colored page on the default Standard tier, with pages starting from about 4¢. Credits never expire and there's no subscription.
- Refunds: failed or cancelled jobs are refunded automatically.
FAQ
Can AI colorize manga accurately?
It can produce clean, publishable color on most well-scanned pages, especially in faithful mode. Expect to correct a few details per chapter, usually character colors or small props.
What resolution should my scans be?
As high as you can get. Pages where screentone dots are clearly visible when zoomed in give much better results than small web images where tone has already blurred.
Will the AI keep the same hair and eye colors on every page?
Not automatically. Use one style and mode per chapter, keep a written color sheet, and fix drift with targeted edits as soon as you notice it.
Is it legal to colorize manga with AI?
Coloring your own work or public-domain material is fine. Coloring and sharing someone else's copyrighted manga without permission is not, regardless of the tool you use.
How much does it cost to colorize a chapter?
On YukiAI's Standard tier, about 4 credits per page. A 20-page chapter is roughly 80 credits, which is the size of the $2 Starter pack.
Ready to try it on your own pages? Open the studio and color your first page, or see pricing for credit packs.